The core role and practical operation methods of the screen washing station in screen printing stencil production.
- Share
- Issue Time
- Apr 1,2026
Summary
Today, let's talk about an indispensable piece of equipment in screen printing – the screen washing station.

Today, let's talk about an indispensable piece of equipment in screen printing – the screen washing station. Many beginners often focus on screen stretching and exposure when they first start out, but easily overlook the use of the washing station. Little do they know that although it seems like a simple "washing tool," it actually directly determines the screen's precision and lifespan, and is a key step in ensuring stable subsequent printing results. Without proper use of the washing station, even the most accurate exposure will make it difficult to produce a qualified screen printing screen.
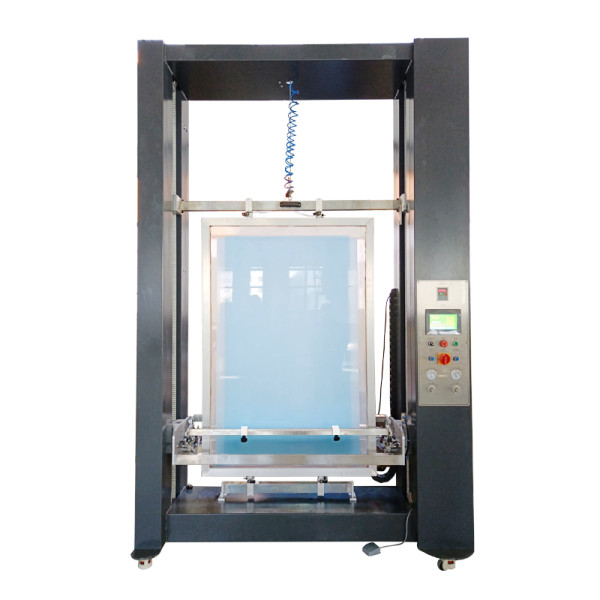
The core role of the washing station in screen printing stencil production is mainly reflected in two crucial steps, neither of which can be omitted. First, development and washing: this is the core step in stencil formation. After exposure, the photosensitive emulsion in the pattern area of the stencil hardens, while the unexposed areas remain liquid. The washing station, through a uniform water flow, thoroughly washes away the uncured emulsion, precisely revealing the pre-set mesh pattern. This ensures smooth, burr-free edges and no residual emulsion, preventing ink clogging and blurry patterns during subsequent printing. Second, cleaning and maintenance: during stencil production, residual emulsion after development, as well as dust and impurities adhering during stretching and coating, will clog the mesh, affect ink penetration, and even render the stencil unusable if not cleaned promptly. The washing station, through controllable water pressure and precise washing angles, thoroughly cleans the stencil, effectively extending its lifespan and reducing production costs.
The practical method seems simple, but there are many details to pay attention to. As long as beginners master the following steps, they can quickly get started and operate in a standardized manner.
I. The first step is preparation:
First, check if the water supply system of the washing station is normal and ensure that the water flow is stable and free of impurities; then, fix the exposed screen plate stably on the support of the washing station and adjust the angle of the support to about 45°. This angle can make the water flow evenly cover the surface of the screen plate and avoid water splashing and glue residue; finally, turn on the water source and slowly adjust the water pressure until the water flow is gentle and has a certain impact. Remember not to adjust it to high pressure at the beginning.
II. The second step is development and rinsing:
Use clean water to rinse the photosensitive side of the screen evenly, then rinse the back side, focusing on rinsing the pattern area repeatedly. During the rinsing process, you can use a soft brush to gently wipe it, but be gentle to avoid scratching the cured photosensitive layer, until the pattern is clearly visible, the mesh is transparent, and there is no glue residue.
III. The third step is rinsing and finishing:
turn off the water source, gently wipe the surface of the screen dry with a clean, soft cloth, being careful not to rub the edges of the pattern too hard, and then put the screen into the drying equipment, controlling the temperature between 40-50℃ to dry it, to avoid moisture residue causing the screen to deform and the photosensitive emulsion to cure again.
There are several key precautions to keep in mind when using this screen printing screen. The water pressure must be strictly controlled between 0.1-0.2 MPa. Too high a pressure will damage the photosensitive layer and cause pattern distortion, while too low a pressure will not remove residual adhesive. A soft nylon brush must be used; do not use a hard-bristled brush to prevent scratching the screen and photosensitive emulsion. It is recommended to use purified or filtered water for rinsing to avoid impurities clogging the mesh. The screen must be dried promptly after rinsing; do not air dry it, especially in humid environments, as this can easily lead to mold growth and screen damage. This seemingly simple rinsing operation involves every detail that affects the quality of the screen. Beginners must pay attention to the correct use of the rinsing station; only by following standardized procedures can high-precision, highly durable screen printing screens be produced.